> For the complete documentation index, see [llms.txt](https://docs.talordata.com/llms.txt). Markdown versions of documentation pages are available by appending `.md` to page URLs; this page is available as [Markdown](https://docs.talordata.com/proxy/integrations/use-talordata-proxies-with-kameleo.md).
# Use Talordata Proxies with Kameleo
Set up Talordata proxies in Kameleo with step-by-step guidance for host, port, authentication, and connection testing.
Configuring proxies in the Kameleo fingerprint browser can assign a dedicated IP to each browser environment, enabling secure isolation for multi-account management. Please follow the steps below to complete the proxy setup.
{% hint style="success" icon="lightbulb-exclamation-on" %}
Before configuring the proxy, you need to obtain proxies credentials. [Click here](/proxy/rotating-residential-proxies/rotating-residential-proxies-quick-start.md) to learn how to obtain proxies credentials.
{% endhint %}
***
{% stepper %}
{% step %}
#### **Download and Log in**
1. Go to the [Kameleo official website](https://kameleo.io/) to download the client
2. After installation, launch it and log in.
{% endstep %}
{% step %}
#### **Create a Profile**
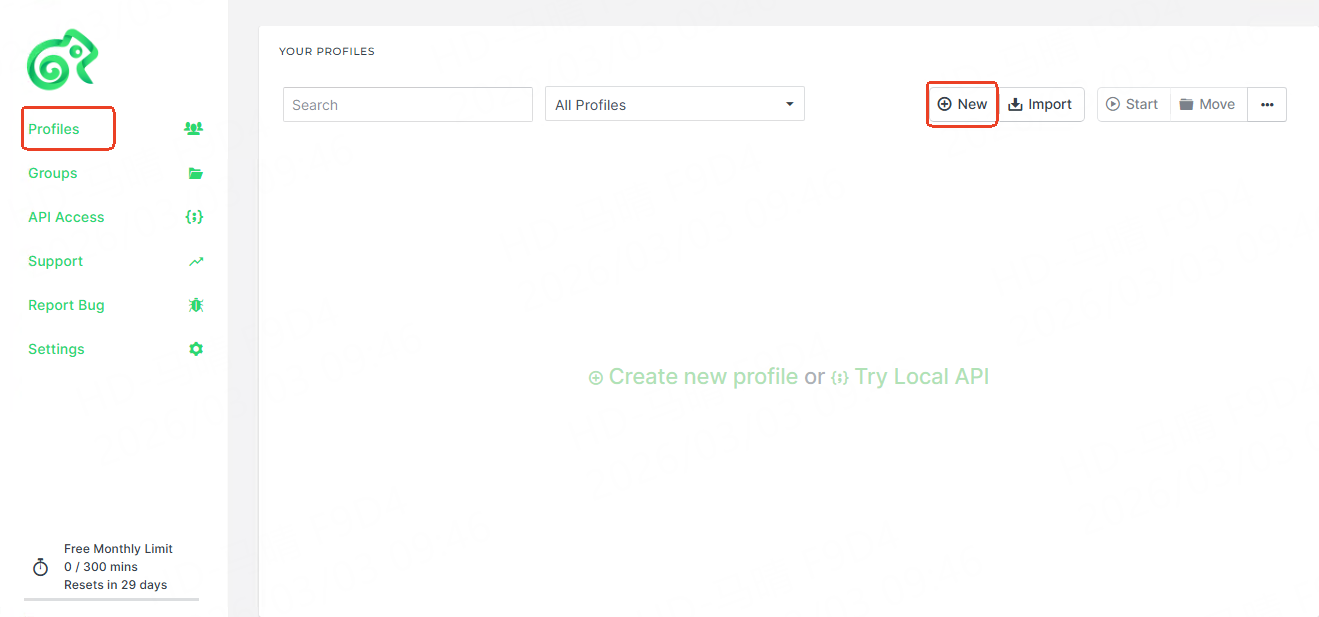
After logging in, on the profiles page, click the **New** button.
{% endstep %}
{% step %}
#### **Configure the Proxy**
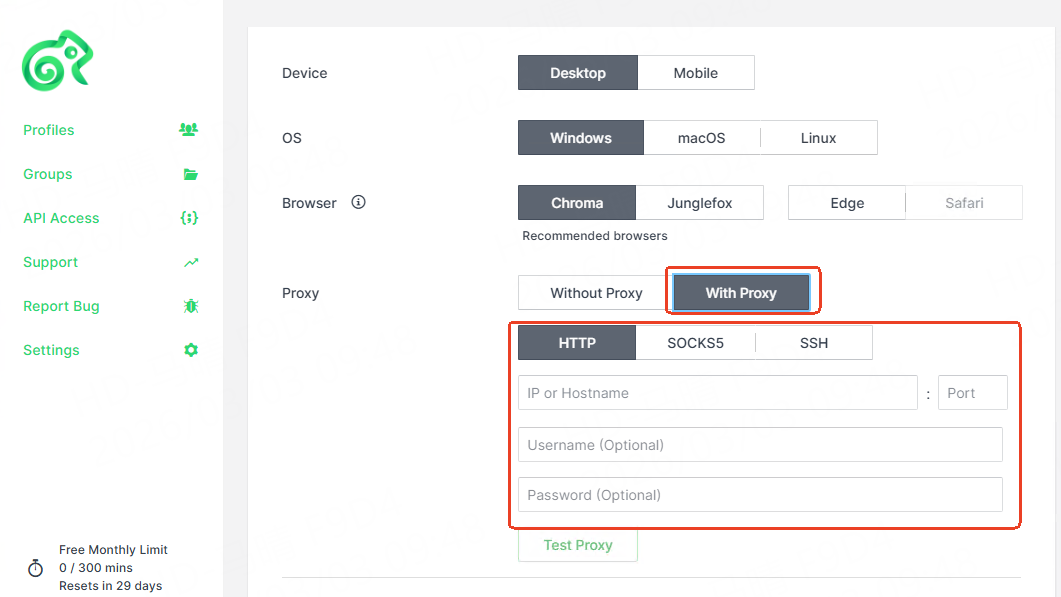
1. In the proxy settings section, select **With Proxy**
2. Fill in the proxy information:
* Proxy type: HTTP/SOCKS5
* Proxy host: Enter your proxy host address
* Proxy port: Enter the port
* Proxy username: Enter your username
* Proxy password: Enter your password
{% endstep %}
{% step %}
#### **Verify the Proxy**
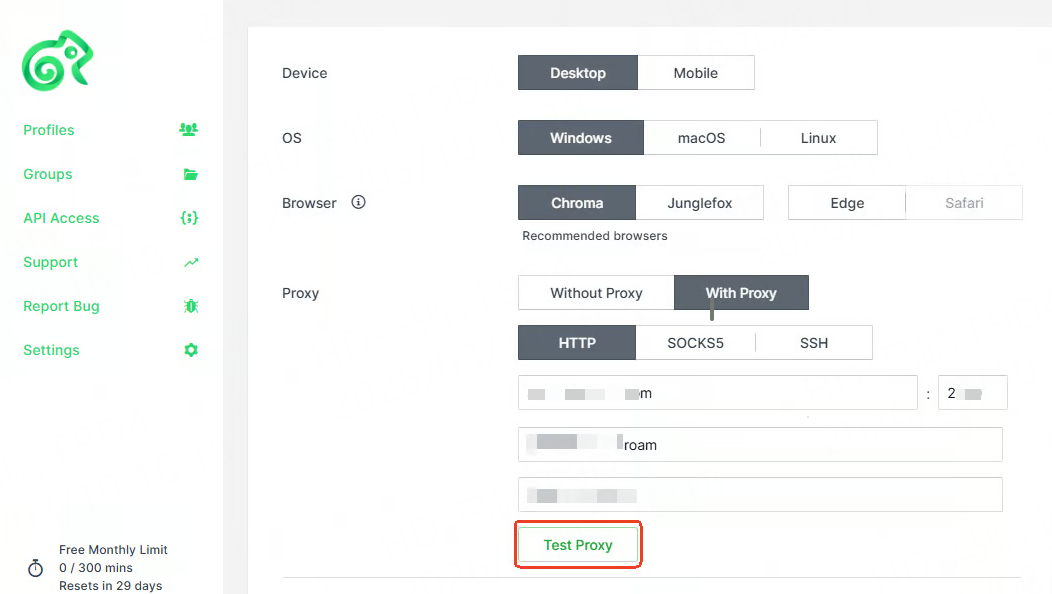
1. Click the **Test proxy** button to confirm that the proxy connection is working.
2. If verification fails, check if the information is correct or try switching the protocol.
{% endstep %}
{% step %}
#### **Save and Launch**
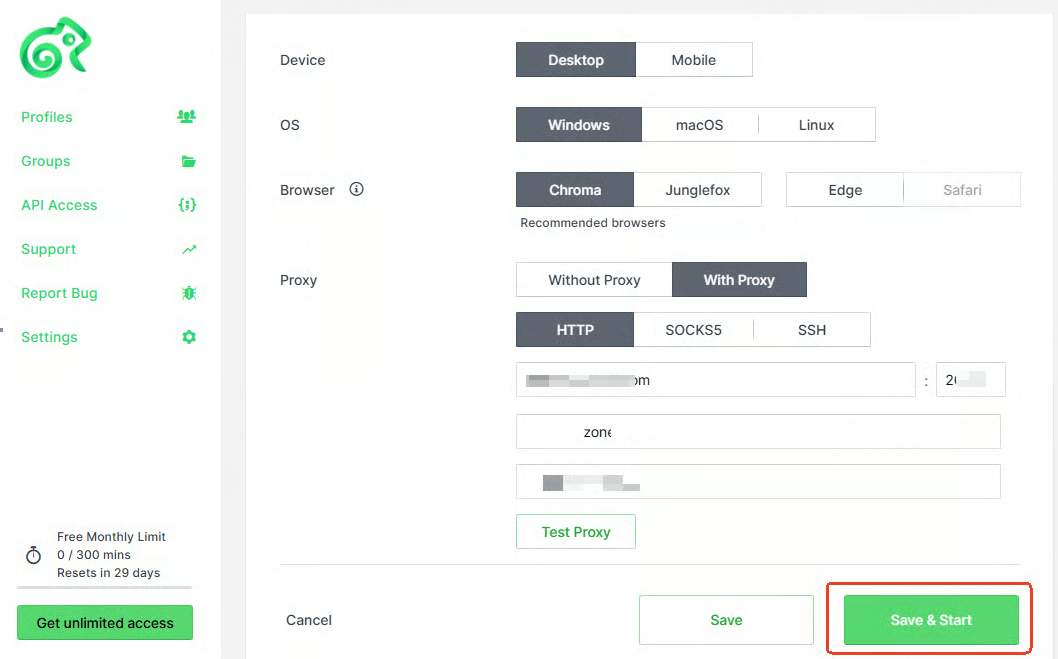
1. Click the **Save & Start** button at the bottom.
2. In the opened browser, visit [ipinfo.io](https://ipinfo.io/) to confirm that the displayed IP matches the proxy settings.
{% endstep %}
{% endstepper %}
***